
Business Phone Numbers for Entrepreneurs
Have your own Business Number anywhere. From $1.79 per month.
Try Free
Have a business phone number anywhere
Get your own phone number in any city or country. Forward incoming calls to your mobile or any phone worldwide. From $1.79 per month.
Try Free — Have a business phone number anywhere
Get a summary of each call
Get a written summary of each business call you make or receive — including a brief summary, a list of agreements made, and a summary of each topic discussed. Available on Premium and Business plans.
Learn more — Get a summary of each call
Get feedback on every customer call
The system analyzes your customer calls and gives each a score from 1-5 based on how well you handled it. Get recommendations for improvements and detailed reasoning. Available on Premium and Business plans.
Learn more — Get feedback on every customer call
Get a draft follow up email
After completing a call, get a suggested follow up email you can send to the person you spoke with — highlighting agreements made during the conversation. Available on Premium and Business plans.
Learn more — Get a draft follow up email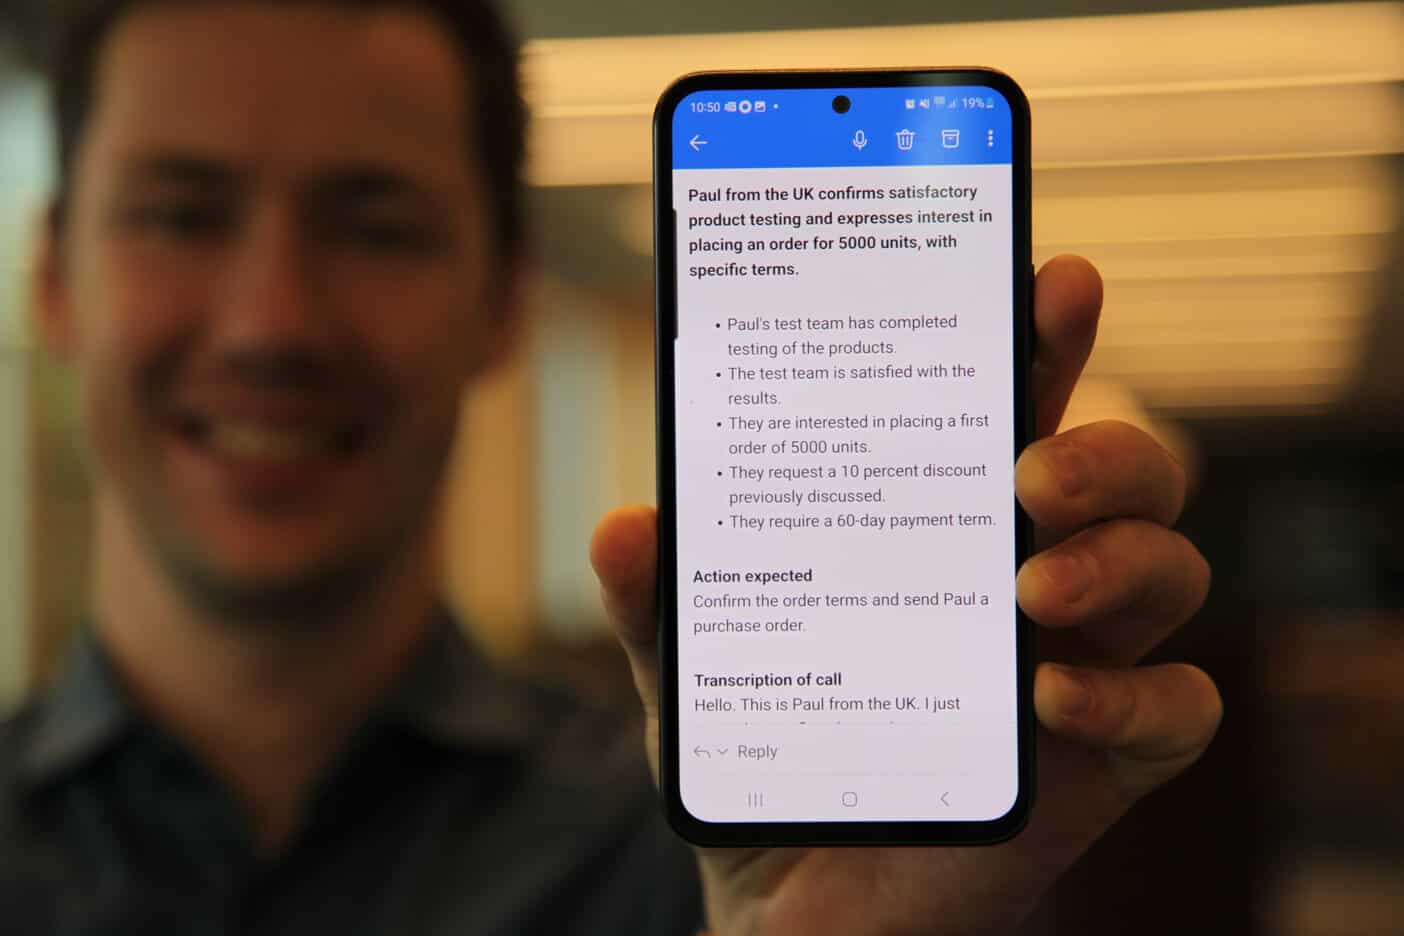
Get text summaries for voicemail
Voicemail messages are automatically transcribed to text with a summary. The language is detected automatically. Available on Premium and Business plans.
Try Free — Get text summaries for voicemail
34,000+ paying customers worldwide
We have 34,000+ active paying businesses across 170 countries. Services were launched in 2009. The company is publicly listed on Nasdaq First North Growth Market in Stockholm, Sweden.
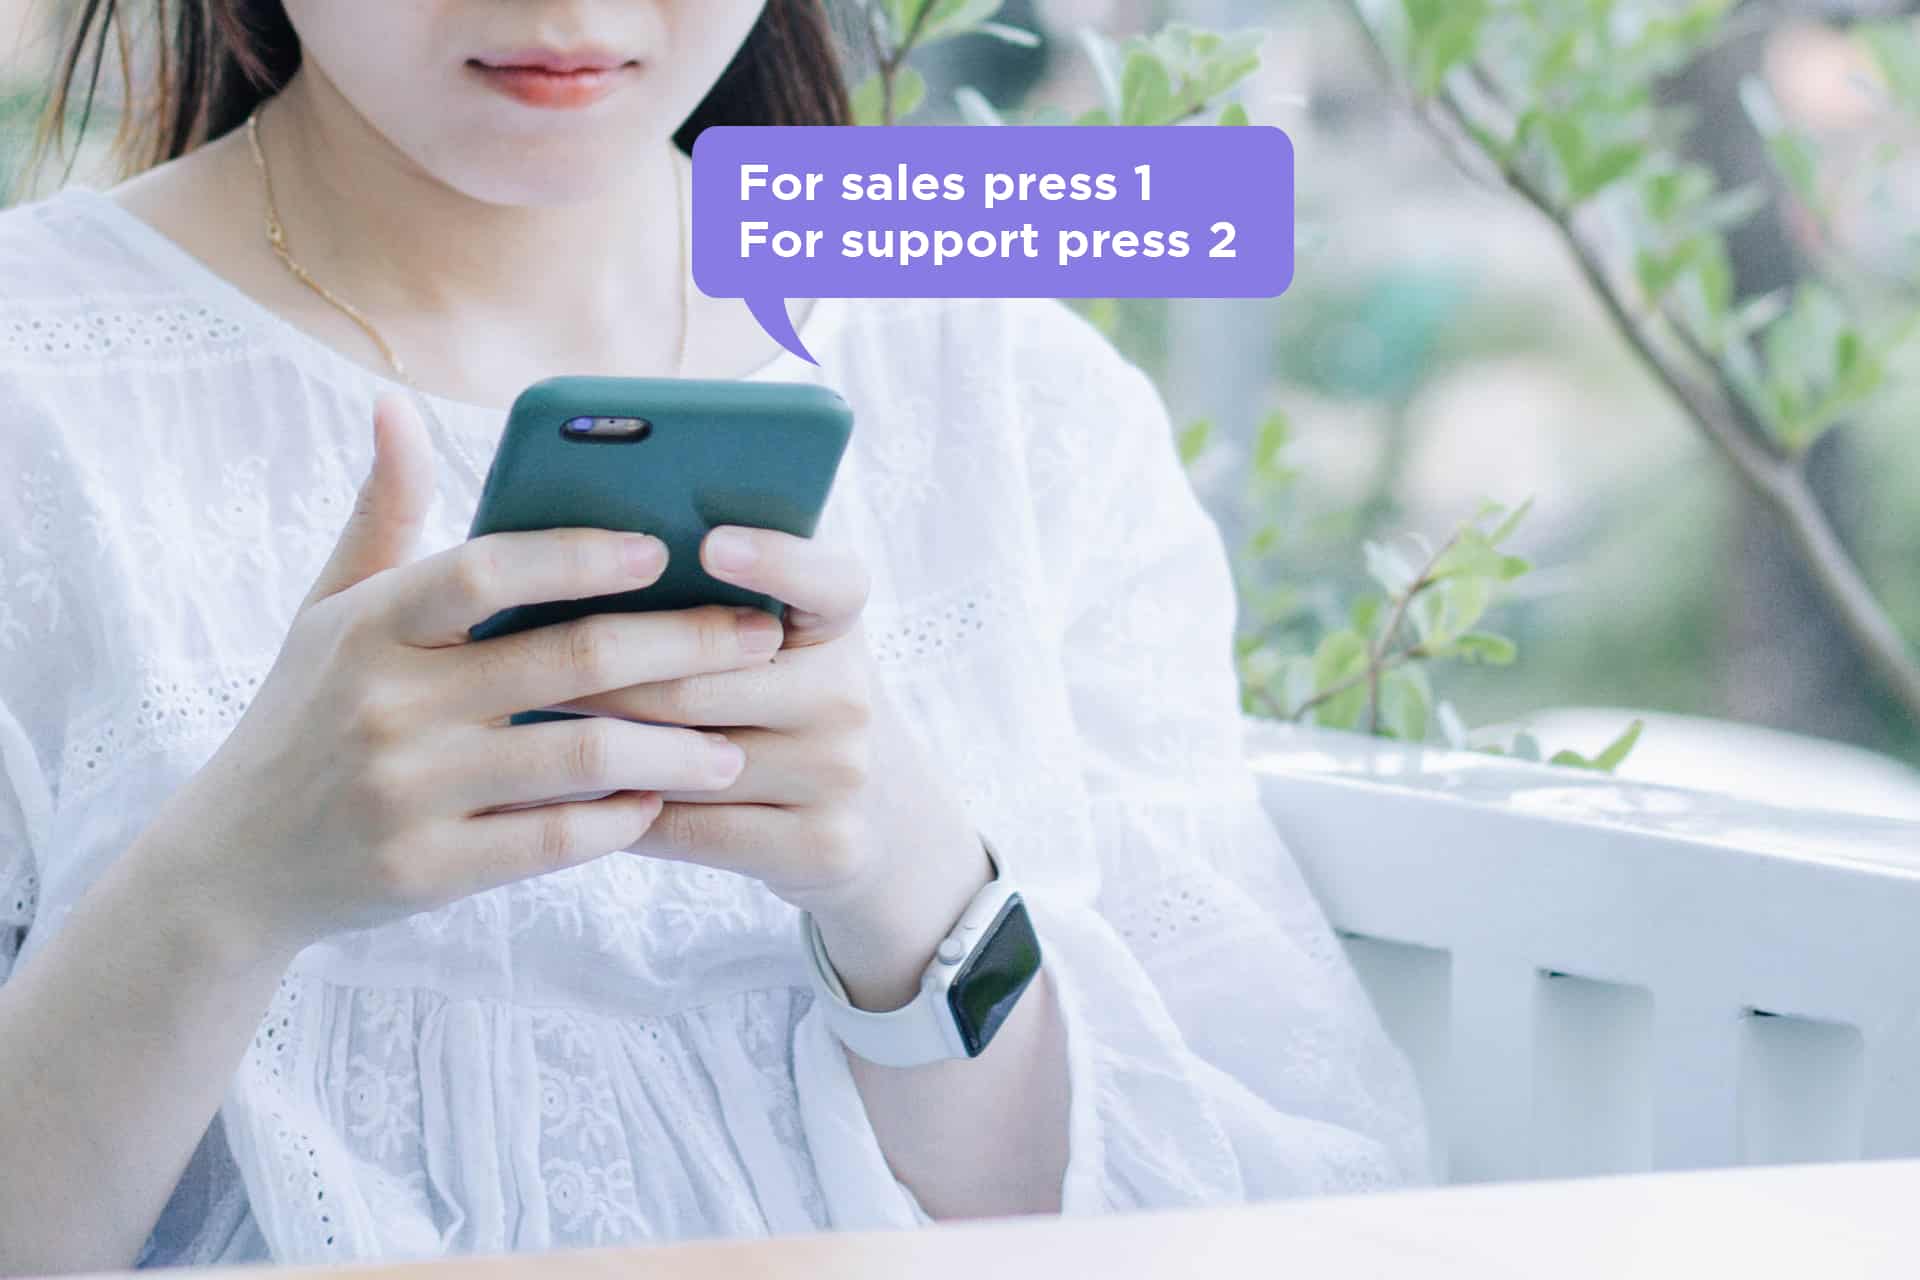
Voice response
Answer incoming calls with a professional voice menu — "For sales press 1, for support press 2." Route callers to the right person or team. Available on Premium and Business plans.
Learn more — Voice response
Make calls
Make outbound calls from your business numbers using the Sonetel app or web app. Your business number is shown as caller ID. Free calls to 40+ countries on paid plans.
Try Free — Make calls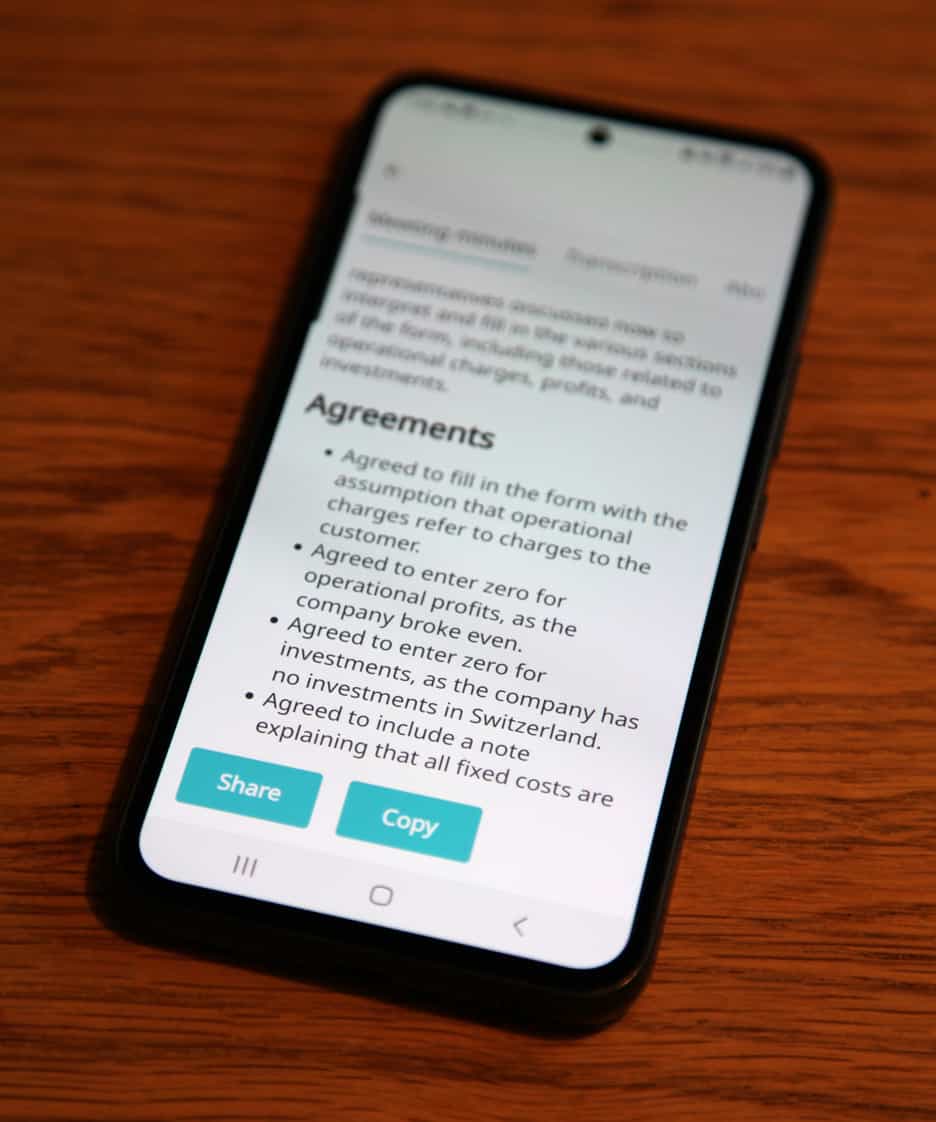
Other services
SMS, meeting summaries, SIP trunking, Communications API, Cloud IVR — explore all the tools available to grow your business.
Learn more — Other services